How to Make a Flower Bed the Easy Way From Scratch
Making a flower bed might look tricky, but it’s easier than you think. With a little planning and some simple steps, you can turn any corner of your yard into a bright, colorful space.
A flower bed gives your garden shape, beauty, and a touch of life that changes with the seasons. You don’t need fancy tools or special skills. Just a clear plan and some time.
In this guide, we’ll walk through how to make a flower bed from start to finish. Simple, clear, and step by step.
1. Pick the Right Spot
The first step in making a flower bed is choosing where it will go. Look for a place that gets enough sunlight since most flowers love the sun.
Watch how the light moves in your yard during the day. Some spots get morning sun while others get shade in the afternoon.
Think about how close the area is to a water source too, so watering is easier. A good spot makes a big difference in how your flowers grow.
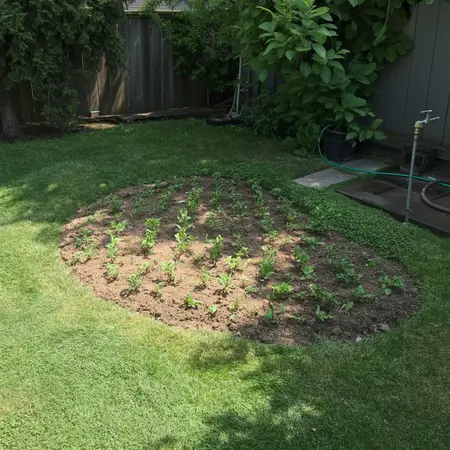
2. Mark the Shape of the Bed
Once you’ve chosen your spot, it’s time to mark the shape of your flower bed. You can go with a simple rectangle, a soft curve, or even a circle.
Use a garden hose or string to outline the shape. Walk around and see how it looks from different angles. The shape sets the tone for your bed, so make sure it feels right for your space. Keeping it simple makes it easier to maintain.
3. Clear the Grass and Weeds
Before you plant, you need a clean space. Remove all grass, weeds, and old roots from the area. You can use a shovel, hoe, or even your hands to pull them out.
If you skip this step, weeds will quickly take over and compete with your flowers. Clearing the bed might take some work, but it sets a strong foundation.
Take your time and do it well. Your flowers will thank you later with better growth.
4. Loosen and Prepare the Soil
Healthy soil is the secret to strong flowers. After clearing the area, loosen the soil with a shovel or garden fork. Dig down about six to eight inches so roots can spread easily.
Breaking up hard soil also improves drainage, which helps plants stay healthy. If your soil is too sandy or heavy with clay, this step will help balance it.
Loose, crumbly soil makes planting much easier and gives your flowers a fresh start.
5. Add Compost or Soil Mix
Now it’s time to feed your soil. Mix in compost, manure, or a good-quality garden soil. This step adds nutrients that flowers need to grow big and bright.
Spread a two- to three-inch layer over the bed, then mix it into the loosened soil. Compost also helps the soil hold water without becoming soggy.
If you skip this step, flowers may not grow as strong. Think of compost as the meal that fuels your garden’s beauty.
6. Plan Your Flower Layout
Before you start planting, plan where each flower will go. Place taller plants toward the back and shorter ones in the front.
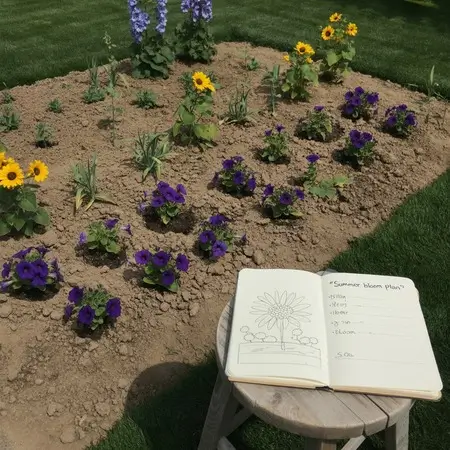
Think about colors too. Mixing bold colors with softer shades makes your bed more eye-catching. You can even sketch a simple plan on paper.
Planning saves time and prevents mistakes like overcrowding. A little thought now will make your flower bed look neat and well-designed later.
7. Place Taller Plants in the Back, Shorter Ones in Front
When planting, remember height is important. Tall flowers in the back give structure, while shorter blooms in the front keep everything visible.
This simple rule makes your flower bed look full and balanced. If you mix heights randomly, some plants might block others from the sun.
Group plants by size so each one has space to shine. It’s an easy trick that makes your garden look professional without extra effort.
8. Plant Your Flowers
Now comes the fun part, planting! Dig holes just deep enough for each flower’s root ball. Gently place the plant inside and cover with soil.
Press the soil down lightly to remove air pockets, but don’t pack it too hard. Give each plant enough space to spread out as it grows.
Planting carefully means fewer problems later. Step back and check how your bed looks as you go.
9. Water the Bed Well
Right after planting, water your new flower bed deeply. This helps settle the soil around the roots. Flowers need water to adjust to their new home, so don’t skip this step.
Keep the soil moist but not soggy in the first few weeks. Regular watering helps the roots grow strong. Once plants are settled, you can follow a normal watering schedule.
Think of this first big drink as a welcome gift for your flowers.
10. Add Mulch to Lock in Moisture
Mulch is like a blanket for your flower bed. Spread a two- to three-inch layer of mulch around your plants. It helps the soil keep moisture, keeps weeds down, and makes your bed look tidy.
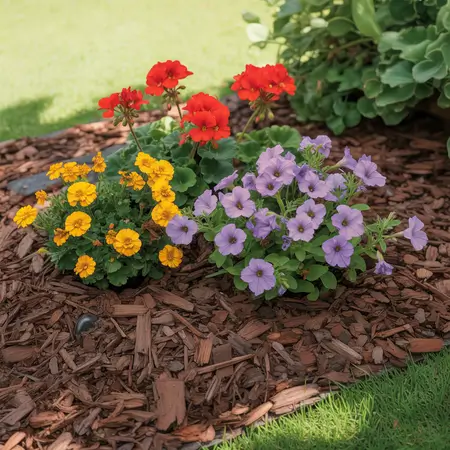
Mulch can be wood chips, straw, or even shredded leaves. Just don’t pile it too close to the stems of your plants. This simple step saves you time and keeps your flowers healthier.
11. Keep Up with Weeding and Watering
A flower bed needs care to stay beautiful. Check it often for weeds and pull them out before they spread. Keep an eye on the soil’s moisture and water when needed.
Some flowers may need trimming as they grow, so don’t be afraid to snip off dead blooms. With a little regular care, your flower bed will stay bright and fresh through the season.
Final Thoughts
Building a flower bed is all about simple steps done with care. From picking the spot to adding mulch, each step matters.
Once your flowers are planted, you’ll see how quickly your yard changes. A flower bed brings color, joy, and life to any outdoor space.
Start small, follow the steps, and enjoy the process. Before long, you’ll have a garden corner that makes you smile every time you step outside.