How to Create a Self-Sustaining Bioactive Terrarium (Step-by-Step Guide)
A self-sustaining bioactive terrarium is like a tiny world in a glass. It takes care of itself with the right setup, so you don’t have to water or clean it all the time.
Inside, plants grow, soil breaks down waste, and little creatures keep the system balanced. It’s a living circle where every part plays a role. Making one at home is not hard.
You just need the right steps and some patience. In this guide, we’ll go through how to build a bioactive terrarium from start to finish. Each step will show you what to do and why it matters, so your terrarium can stay healthy on its own.
Step 1: Choose the Right Container
Pick a clear glass jar, vase, or tank. It should have enough space for layers of stones, soil, and plants. A lid is important because it traps moisture and helps the terrarium keep its own cycle of water and air.
Make sure the glass is clean before you start, so your plants and tiny critters have a fresh home. You can use something simple like a mason jar or something large like an aquarium.
The container is your little world, so choose one you enjoy looking at every day.
Step 2: Add a Drainage Layer
At the bottom, add a layer of small stones, gravel, or clay balls. This layer helps extra water drain away so the soil doesn’t get soggy. Without it, roots can rot, and plants may die.
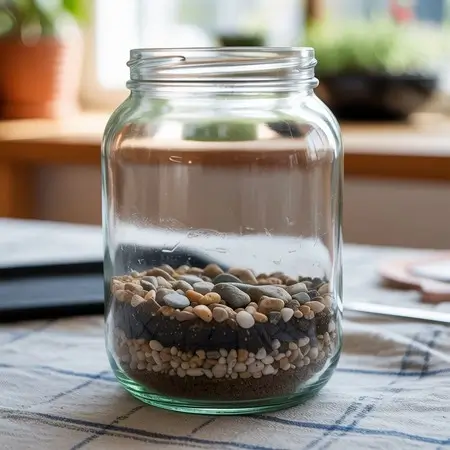
About one to two inches is enough for most jars. The drainage layer is like the plumbing of your terrarium.
It makes sure water has somewhere to go, even though there are no holes at the bottom. This step keeps everything healthy and gives the rest of the system a strong base.
Step 3: Create a Barrier Layer
On top of the drainage, place a thin mesh or piece of fabric. Some people even use coffee filters. This barrier keeps soil from falling into the rocks while still letting water pass through.
Without it, your layers can mix, and the terrarium won’t look neat. The barrier also makes it easier for you if you ever want to change or clean the soil later.
Think of it as the divider between plumbing and soil. It’s simple but makes a big difference in keeping the terrarium balanced.
Step 4: Build the Soil Layer
Now it’s time for the soil, which will support plants and the cleanup crew. Use organic potting soil without fertilizers or chemicals.
You can also mix in some coco fiber, sphagnum moss, or orchid bark. These materials help the soil hold water while staying airy.
Make the soil layer about two to three inches deep, depending on your container size. The goal is to give roots enough space to grow. Healthy soil is the heart of the terrarium, feeding plants and giving microfauna a place to live.
Step 5: Add Leaf Litter and Moss
Scatter dried leaves, bark pieces, or moss on top of the soil. This mimics the forest floor. Over time, the leaves break down and become food for the tiny critters you’ll add later.
Moss also helps hold in moisture and keeps the top layer green. This step doesn’t just look nice. It adds function.
The litter becomes part of the natural cycle, breaking down and turning into nutrients. Think of it as nature’s blanket that protects the soil and makes the terrarium look alive.
Step 6: Introduce the Cleanup Crew
Here’s where the magic starts. Add small creatures like isopods (pill bugs) and springtails. These are your cleanup crew. They eat dead leaves, mold, and waste, then turn it into nutrients for plants.
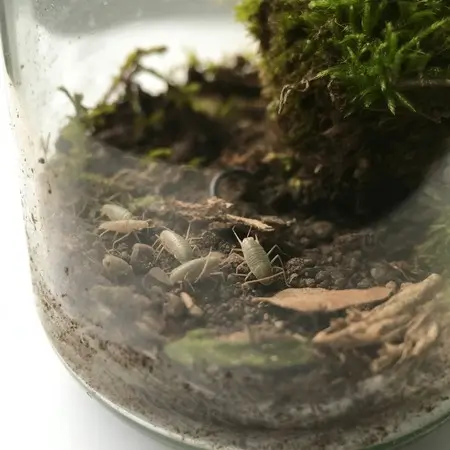
You don’t see them often, but they work all the time. Without them, the terrarium could grow mold or smell bad. These critters make the terrarium bioactive, meaning it runs on its own.
Think of them as the silent workers that keep the whole system running smoothly every single day.
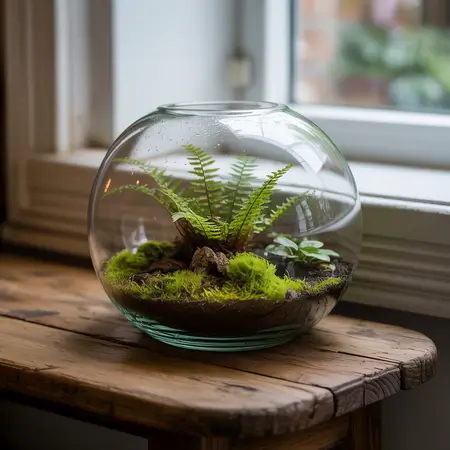
Step 7: Plant Your Greenery
Choose small plants that enjoy humid, low-light spaces. Ferns, fittonia, mosses, and baby tears are great choices.
Arrange taller plants at the back and smaller ones in front to create depth. Use a spoon or stick to make small holes for the roots. Gently press the soil around them so they stay in place.
Don’t overcrowd, leave space for growth. Plants don’t just add beauty; they also clean the air and recycle carbon dioxide. They’re one of the most important parts of your mini world.
Step 8: Add Decorative Touches
If you want, you can decorate your terrarium to give it personality. Add rocks, branches, shells, or even small figures.
These touches make your terrarium feel like a little landscape. A branch can look like a tree in a tiny forest, while a rock can become a mountain.
Decoration also helps break up space between plants and gives critters places to hide. It’s not required, but it can make the terrarium more fun to look at. Just keep decorations natural and safe for the system.
Step 9: Mist and Seal
Once all the layers and plants are in place, give the terrarium a light mist of water. The soil should be damp but not wet. Then seal the container with a lid or cover.
This traps humidity and starts the water cycle inside. The water will rise as vapor, then drip down again like rain. Over time, this cycle keeps your terrarium alive without extra watering.
Sealing also helps keep the cleanup crew inside, so they can continue to do their work.
Step 10: Observe and Adjust
Now the fun begins. Watch your terrarium grow. For the first few weeks, check for signs of balance. Too much fog means there’s too much water; you can open the lid for a while.
Dry soil means it may need a small mist. Over time, the plants, soil, and critters will find their rhythm.
A self-sustaining terrarium doesn’t need much care, but observing helps you learn how it works. It’s like having a small forest that shows you how nature balances itself.
Final Thoughts
Building a self-sustaining bioactive terrarium is like creating your own tiny ecosystem. Every layer and every creature has a job, and together they form a living circle.
Once it’s set up, the terrarium mostly cares for itself. All you need to do is enjoy it and watch it change over time. It’s a piece of nature you can keep on your desk, shelf, or table—always alive, always growing.